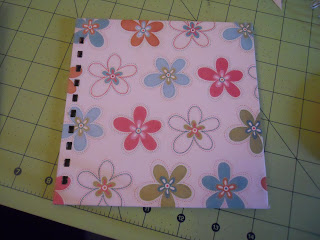
To make this notebook, you will need:
- Two 6 inch squares of chipboard
- Two 7 inch square pattern paper (outside cover)
- Two 5-3/4 inch square paper (inside cover)
- Twenty-five - 5.75 inch paper
- 3/4 inch Zutter O-wires
- wire cutters
- Zutter Bind-It-All
First, score the two 7 inch squares 1/2 on all sides. (This will make it easier to center the chipboard on the paper.) Next, apply adhesive to each 7 inch square of pattern paper. I used a tape runner on the center. Then I applied red tacky tape to the edges. Tacky tape is very strong.
After the edges have adhesive on them fold them to the center. Do not smooth down the corners.
Pinch the corners together. Then, cut the excess away, and smoot with a bone folder.
Attach the inside cover with adhesive.
Next, set the Bind-It-All to C for the cover.
Insert the cover. Pull the lever to punch the holes.
Assemble the notebook.(back cover with outside facing up, front cover with inside facing up, inside paper) Make sure holes line up. Insert the O-Wires.
Place the assembled notebook into the Bind-It-All so that the O-wire open end is flat against it. Pull lever.
The notebook is completed. Embellish the notebook to your liking.
Here is the completed notebook.


Wow! You are very creative. I love notebooks too. I write in one daily and dont leave home without it.
ReplyDeleteVery cool! I'll bet it's fun to imagine the books you can make.
ReplyDeletewe LOVE cute notebooks - this tool looks like a good investment!
ReplyDeleteGreat project and I love the tool. I have never tried anything like this. The blogging world is a small word. I noticed where you live, I live in Tuscaloosa. come by and check out my blog some time. I have become a follower.
ReplyDeletehttp://joynana-lovethatpaper.blogspot.com
Hey keep posting such good and meaningful articles.
ReplyDeleteThat is an extremely smartly written article. I will be sure to bookmark it and return to learn extra of your useful information. Thank you for the post. I will certainly return.
ReplyDelete